Use document libraries to upload and organize documents, images, and videos that you may need to access for other sections of the LMS.
To manage document libraries go to Tools > Maintain Document Libraries in the Navigation Bar of the Administrator's Console. To edit an existing library, select it from the list on the main screen and click the Edit button in the toolbar. To create a new library, click the New button in the toolbar.

A new blank Library will open.

Type a Title for the new library.
Click the Active checkbox if you want the library to be available immediately to the LMS. You may leave it unchecked for now, if desired.
Type a brief Description of the new library (optional).
Type a Folder Name for the root library folder.
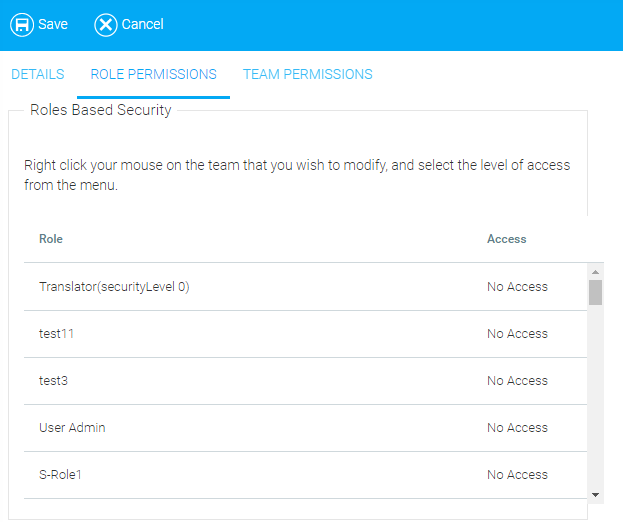
When the basic details are filled in, go to the Role Permissions tab.

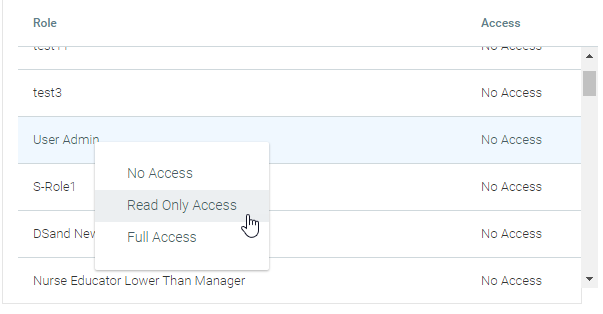
Initially no roles will have access to this library. Right-click on each role that you want to grant access, and select a permission level from the context menu.

Once you click on a permission level, it will appear in the Access column on the right.
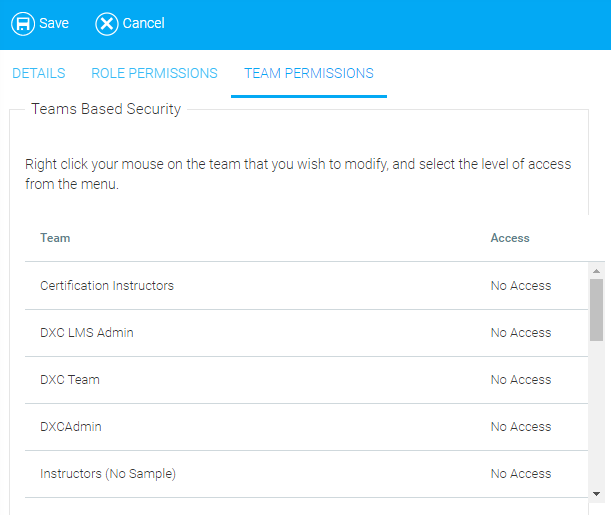
If you wish the library to be visible to designated teams, continue to the Team Permissions tab.

This tab works exactly like the Role Permissions tab. Right-click on a team to assign Read-Only or Full permission.
Click Save to preserve changes and return to the Maintain Document Libraries screen, or click Cancel to return to the main screen without saving.